In addition to being able to share your lightboxes with other users by simply sending a link by email, multiple users can work together on lightboxes with the lightbox collaboration function. This is also useful for e.g. Client proofing.
Recommended reading
Shared lightboxes and Lightbox collaboration
Normal shared lightboxes can be sent to anyone (with or without an account on your website). Shared lightboxes allow the recipient to view the lightbox without the need to sign in. If however, the recipient of a shared lightbox link is logged in, then they can add files from it to a lightbox in their own account. Or to their cart/order. Shared lightboxes are dynamic, so if you (as lightbox owner) make changes, then the recipient will see those changes – and if you delete the lightbox, then the recipient will no longer be able to access it. As a staff member, you can of course also change any user’s lightbox by use of the backoffice tools.
The lightbox collaboration function lets any user invite others with an account on your website to work together with them on as many lightboxes as they want. To invite a user, you must know the user’s e-mail address. You can configure what other users are allowed to do, i.e. view only, add files, change the notes, and inviting other users to work on the lightbox as well. Note that users will only be allowed to remove files that they added themselves, with the exception of the lightbox owner who will be able to remove any file, and to delete the lightbox as usual. Furthermore, users can start message threads with others who are working on the same lightbox.
Configuring Lightbox collaboration
To enable this function on your website, go to Site configuration, Lightboxes in Backoffice. Open the section Collaboration and tick “Enable lightbox collaboration”. Then save your settings at the bottom of the page. The lightbox collaboration function requires the website notification system to be enabled. You can enable this by adding the Refresh notifications menu item to one of your menus (Website menu builder). By default, the number of notifications will display next to the My Account menu item in the main menu. If you have moved this menu item out of the main menu, or if you want the notifications indicator to be displayed elsewhere, then you will need to add a placeholder to your custom header/menu template. For further information about this, contact support.
Note that the way this function works – or where it is available in your website – is slightly different if you use lightboxes in Windowed or Classic mode. In Windowed mode, the lightbox appears inside a window that displays on top of the page one is viewing. Classic lightbox mode uses a separate page for lightboxes. The lightbox panel at the bottom of the search page is still available regardless of the Lightbox mode that you have configured.
Inviting a user to work on a lightbox
In both Windowed and Classic mode, when on the search results page with the lightbox panel at the bottom open, click on Lightbox tools. Then click on Collaborate for the lightbox that you want to share.
In Windowed mode while viewing a lightbox full screen: click on lightbox tools in bar at the top of the window.
In Classic mode while viewing a lightbox page, click on Collaborate in the side bar. Then click on properties.

Screen shot of lightbox invitation dialog
The above dialog will appear. Enter the user’s e-mail address and a message text (optional) and click the checkboxes to configure what the user is allowed to do. Finally click on Send invitation. If a user account can’t be found then a message will appear. Note that you can only invite users if you know their e-mail address and if they have an enabled account on the website.
Adding a new user account instantly (admins/staff members)
If you are logged in with an admin account, the the dialog will show a link to create a new user account above the e-mail input box. This lets you create a new user account immediately so that you can invite users that have no website account yet. Such users will receive a link to the lightbox that requires them to enter a new password – after which their account is automatically enabled and the lightbox will load. This function can be used e.g. for “Client proofing”.
If an invitation could be created, the dialog will close and a confirmation message will appear. Lightbox invitations are sent by e-mail and you can change the e-mail templates with the e-mail template editor in backoffice. The name of the invitation template is lightboxinvitation.txt and the template that is used if you created a new user account (as described above) is lightboxinvitationpw.txt.
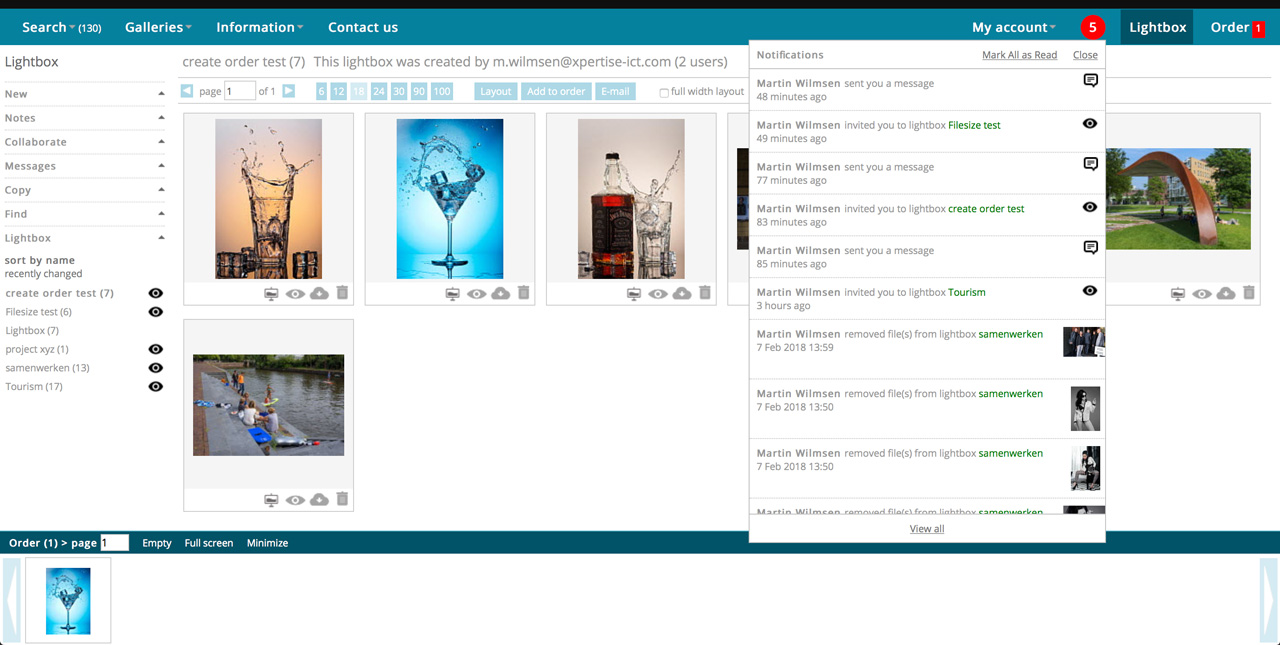
Notifications
You will receive a website notification when the invitation is accepted. To check the status you can again click on Collaboration to open the properties dialog. It will show the names and permissions of invited users, whether or not the inviation has already been sent and whether or not the user has accepted your invitation. You can also use this dialog to remove users from the lightbox – provided that you are the lightbox owner. The XS notification system will instantly show a notification to let the user know about your invitation if he or she is currently logged in. So users may actually have already accepted your invitation before the e-mail has been sent. To prevent notifications from taking up too much server time, notifications are refreshed only when a user does something on the website – e.g. changes to another page or refreshes the current page. And you can of course click on Refresh notifications in the menu.
Working with lightboxes
Names of lightboxes that are shared (i.e. that have multiple users working on them) are indicated with a small icon. A different icon is used to indicate that the lightbox is yours (you are the creator) or that your lightbox is used by others. Collaboration lightboxes appear on all pages as normal lightboxes. Working with such lightboxes is no different then working with normal lightboxes. But if you make changes, then the other users will be notified and vice versa. Users that are not the owner of the lightbox can remove only files that they added themselves – provided that you have granted them to remove files.
Lightbox messages
If you have enabled Lightbox Classic mode, then users will be able to start a message thread to communicate about the lightbox. The side bar will show a section Messages. Open it and click on View messages to open the message dialog. If no message thread has been started yet, you will be asked if you want to start a new thread. In the dialog you can choose the user you want to send the message to by clicking the radio button in front of the user names. Message threads are stored so that you can keep sending and receiving messages within a single message thread. The message has a link to the lightbox to make it easy for the recipient to go to the lightbox that the message is about.
Note that you can always go to an overview of all messages (sent and received) with the /mymessages url. This is not added to the menu by default but you can create a menu item for it if you want. The website notifications list (that appears when you click on the notifications indicator in the menu) will take you the messages page if you click on a notification that is about a message thread.

Screen shot of lightbox related message thread
Unavailable lightboxes
If a lightbox is deleted or if a user is removed from a lightbox, then it will no longer be accessible. A page will appear telling the user that the lightbox is no longer available. You can change this notification page to meet your requirements with the Code editor. In the drop down box at the top, click on “Lightbox not found/no access”. Edit the text and click Save when you’re done.