
The Gallery function is one of the most powerful features of XS. Galleries are an essential part of most photo library websites and galleries can be used for many different purposes. The gallery system provides a way of grouping certain files together, and simply presenting those as such to end users. Within the Infradox system, the word gallery is a more generic term. A gallery can be a photo story, a feature, a photographer’s portfolio, an event, a sports match or simply a group of related files (sets). Furthermore, you can set up gallery structures to provide categorised searches, to create full screen slide shows, blog style posts and so on.
Related articles: Custom Gallery Root page, Gallery Set editor, Gallery features page, Search categories.
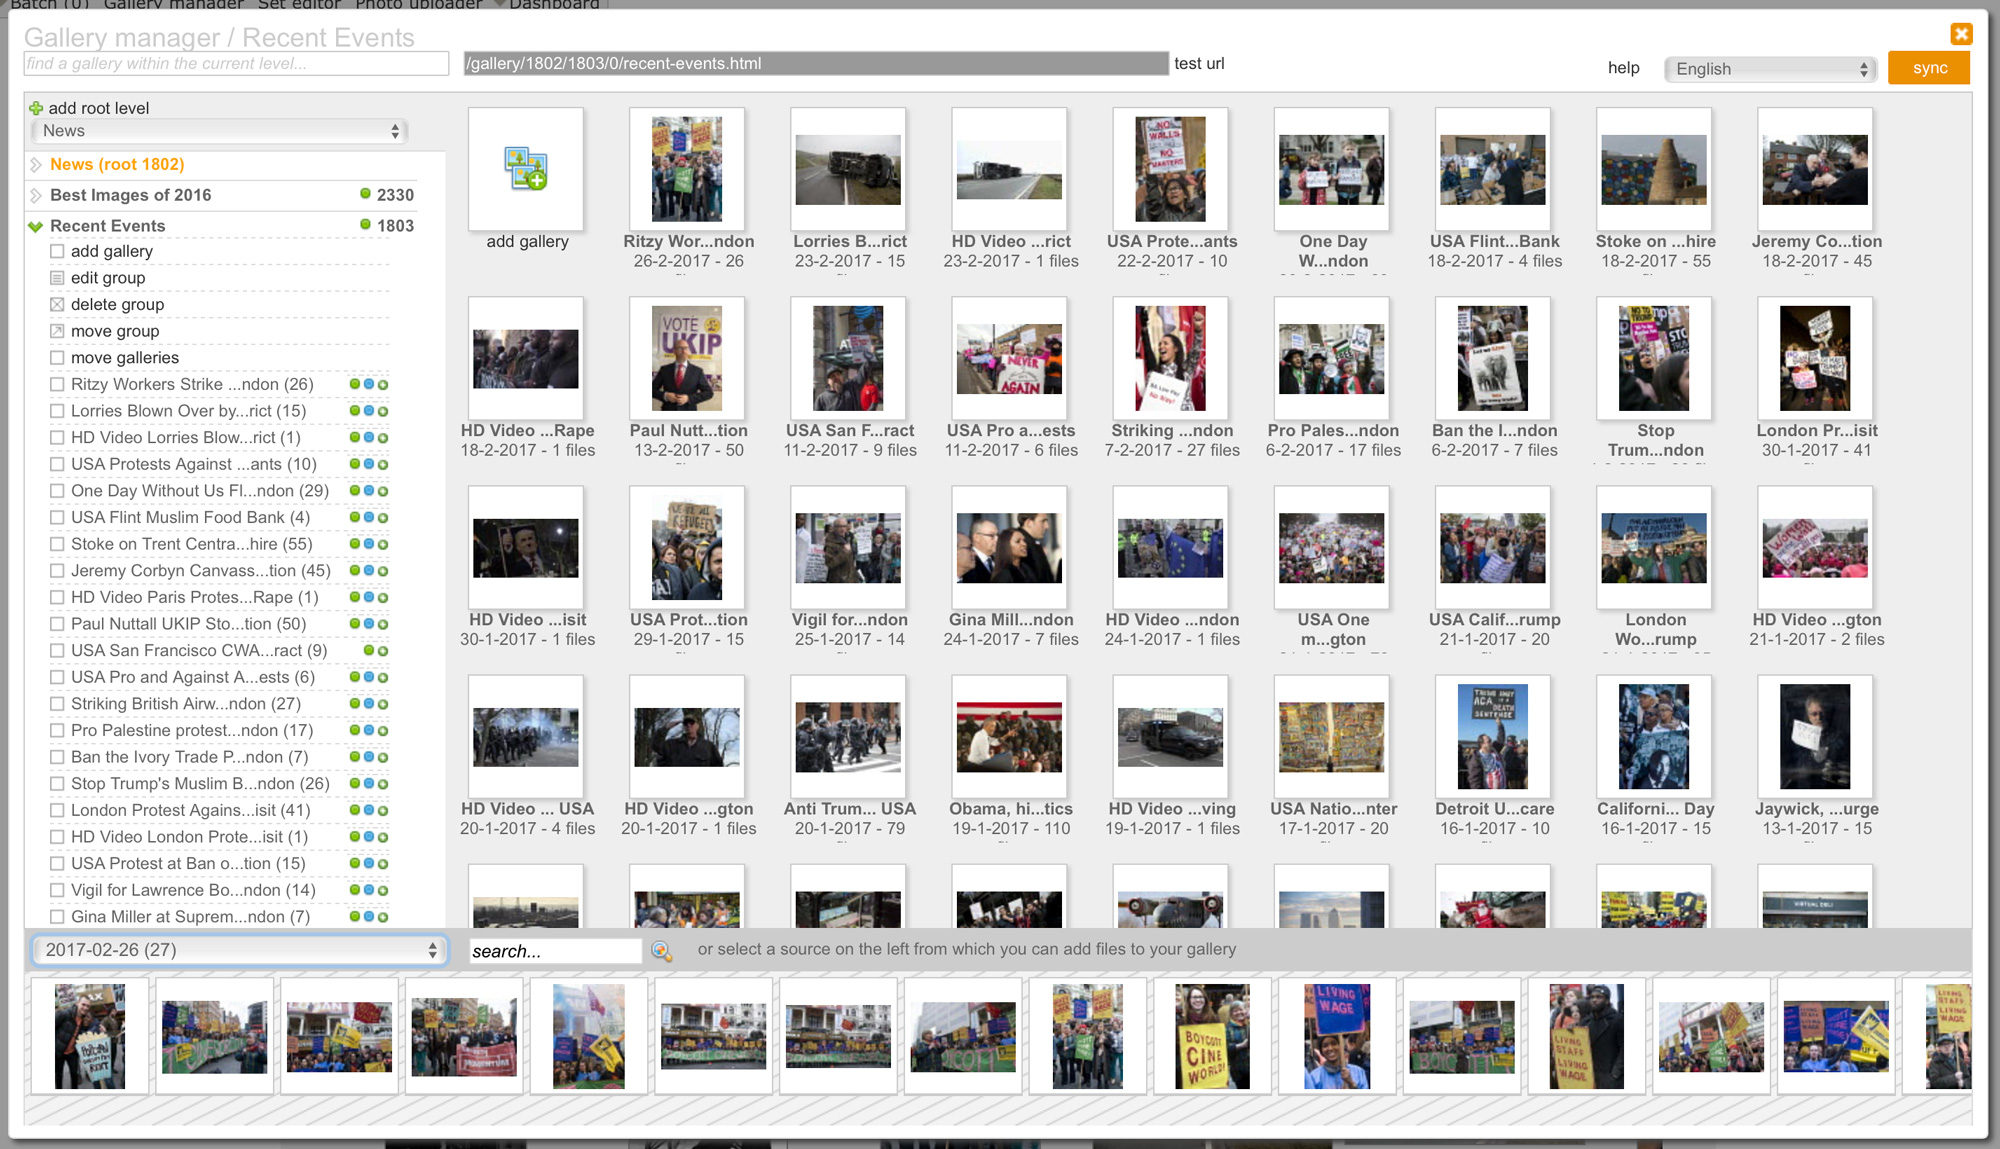
The Gallery Manager
To be able to use the Gallery manager, you must be signed in with an admin account with such permissions, and you must have enabled the Admin toolbar (in the Account dropdown menu). In the Admin toolbar, click Gallery Manager.
Note that if you are viewing a gallery page on the client facing website, that gallery will be automatically selected when you open the gallery manager. If not, you can find a specific gallery by typing part of its name in the search bar on the top left. This function searches within the current “root level” (more underneath) only though.
Finding a gallery
In the panel on the left, click on the small arrow in front of a group name to expand it and to show the titles in that group. Clicking on the name instead will show the galleries and thumbnails in the panel on the right. Items are loaded 100 at a time. You can type (part of) a gallery name to find it if you have many galleries in a group. The list will show found titles. Click a name to locate it in the tree view.
If the item is not already in the tree view, then you can automatically load additional items until the item that you are trying to locate appears. The suggestions list also shows an edit link. You can click this link to edit a gallery without having to load all the tree items (i.e. other galleries in the same group).
Gallery structure
The galleries are structured as a tree (or hierarchy). You can create an unlimited number of so called “root levels”, and within each root level you can create groups. Each group can have any number of galleries. You can apply different settings to the root level and to its groups. Those settings will affect anything inside that level or group, so you have to make sure that you understand the consequences of any changes that you make.
Before you can create a gallery, you’ll have to create a root level (add root level link, top left of the Gallery manager window). It is best to create separate root levels for galleries that have a different meaning or that function in a different way. For instance, create a root level for subject galleries and create a separate root level for categories. The difference between categories and normal galleries is explained further down.
Note that in many cases, a single root level and sometimes even a single group may suffice. As an example, photographer portfolios can be created in a separate group within one and the same root level that you use for your subject galleries, model shoots, photo stories and so on. All within a single root level.
High volume automated galleries
If you are automatically creating galleries and there are many galleries in a group for specific root level, then you can prevent such galleries from loading into the gallery manager by configuring the top level item. In the gallery manager, click on the root level that you want to change so that its options appear underneath. Then click on edit level to show the properties. Tick the box Contains high volume automated galleries and scroll down to save the properties. Galleries within this top level will no longer be loaded. You can still create and change its groups. You will still be able to edit the automatically created galleries on the client facing pages by use of the Set editor as described below.
Also read: Gallery processing for further information about automatically creating galleries for e.g. events and so on.
Set editor
Besides the Gallery manager, you can also use the Set editor to create or change galleries on the client facing pages. This function is described in detail (with screen shots) in the article Gallery Set editor.
Gallery automation
You can configure processing rules to automatically create and/or update galleries. For example to automatically create a set of photos from the same football match. This is explained in the article Gallery processing.
Gallery root page
You can configure a page that will list all (or selected) groups and galleries. The URL for this page is /galleries/{anyname}.html. Replace {anyname} with something you want to display in the URL. For instance /galleries/showcase.html or /galleries/overview.html. You can add this URL to your menu or anywhere you like. If you want to highlight one of your menu items when the page is loaded, then use the URL /galleries/{menuid}/{anyname}.html. Replace {menuid} with the id of the menu item that you want to highlight. E.g. /galleries/4/overview.html.
To configure how this page works, go to Site configuration, General settings and open the section Gallery pages. One of the configuration options allows you to display a so-called tree that lists all the top levels and groups on either the left or the right of the page. Clicking the top most item will display all so-called top levels including the number of groups in each level. The label of the top most item is the Page title that you enter in Site configuration as described above. You can choose to load a new page with the groups of a selected top level when a user clicks on a level title. Or you can display the groups “in-page”. The latter means that the user stays on the same page and only the HTML that displays the groups will be replaced (in the same page without reloading).
There are currently two display styles for the groups that you can choose from. You can of course change the appearance of the group boxes by applying custom CSS.
Including galleries and groups from selected top levels on the gallery root page
To include a root level on the gallery root page, open the Gallery manager and select the top level in the dropdown box on the top left. Then click the arrow button on the left of the root level’s title (displayed in orange). Click on Edit level. Check the box Use for gallery root page and finally click the Save button at the bottom of the panel.
Setting up a top level for category searches
You can configure a top level to act as a page with categorised searches where each group represents a category and each gallery represents a subcategory. On the client facing pages, clicking on a group (i.c. a category) will display the subcategories, clicking on a gallery thumbnail (i.c. a subcategory) will execute a search (as opposed to loading a gallery page). There’s a separate article about this subject in which this is explained in more detail.
To configure a top level for categories, edit its properties with the Gallery manager (click on the icon left of the top level title, then click edit level) and change the top level root style dropdown box to Categories.
The top of the categories page can display an instruction, for instance the text “Click a category on the left to display its subcategories”. You can enter your text in the description of the top level. This is the text that will show on the client facing categories page.
Now you can start adding gallery groups that will act as Categories. For example, you can add a group with the name Architecture. To add subcategories to this group, simple create a gallery and add just one thumbnail. E.g. add the galleries Buildings, Bridges, Interiors and so on. Galleries that you create inside a Categories toplevel will be automatically configured as Search only.
You’ll have to enter a search query for each of the galleries (subcategories) that you create. If the user clicks on a subcategory, the search page will load. It will display the Category and the subcategory as the page title. The search query can use normal keywords (with Boolean operators and wildcards), but you can also add unique codes to your files to make the search results more precise. For example, you can use the code SCP for People and the code SCP1 for Couples, SCP2 for Children and so on. These codes are just examples, actual codes can be anything.
You can choose between the default size and large size thumbnails for the categories page. Simple styling is possible by adding your own custom CSS.
If you want to build a custom gallery root page, then read the article Custom Gallery Root page.
The URL for a categories page is determined by the name that you have used for the top level item (in Gallery manager). So if you have named the top level item categories, then the URL is /categories. If you have named the item e.g. Browse subjects, then the URL will be /browse-subjects (note that spaces will be replaced with dashes in the URL’s).
You can add the URL to the menu, page footer or wherever you want to make it available on your pages. You can create a rewrite rule if you want to change the name based URL, but that is not recommended. More information about rewrites can be found in this article: Custom URL rewrites.
A category page displays the category names on the left of the page, and the subcategories for the selected category – with thumbnails – on the right. The web server software looks up the details by the category and subcategory names that are part of the URL (category URL’s always end with .html).
For example: www.mywebsite.com/categories/people.html to display the categories for the selected top level category.
The part /categories/ is fixed. The name part is variable, it’s the name of the group that you have created.
For example: www.mywebsite.com/category/people/portraits.html to display the search results for the query that you have created for the category portraits.
Note that the part /category/ is fixed. The name parts are variable and they are the name of the group and the name of the category.
So the first part tells the software to retrieve data from the database for a subcategory (gallery) with name portraits and a parent (category or group) with the name people. The retrieved data has the search query to execute and – if any) the filters to apply to the search. The search query and filters are not part of the URL.
To apply filters to the category searches, specify filters in the gallery manager. You can add filters to the root/top level, to the categories/groups and to the subcategories/galleries – if the root level is set up for categories. The search filters are compound, i.e. all filters are applied top down.
In the gallery manager, where you can enter filter codes, you can click help for an explanation about how to enter the filter codes. You can use both the standard filter codes (f0 to f7) and your own custom filter codes – starting with f10.
Display a gallery in additional groups / different contexts
You can attach a gallery to one or more additional gallery groups. You can use this function to display galleries in different contexts. The below example explains how this can be made to work on the client facing pages. We’ll explain the steps you need to take for this example to work in detail further down in this article.
We have created a gallery root level with the name “Photographer series” and within this root level we have created groups for each photographer. Each group (i.e. photographer) is linked to the correct contributor. We have configured processing rules to automatically create galleries within these photographer groups, when multiple files are uploaded with the same “series title”.
We have created a gallery root level with the name “Photo stories” and within this root level we have created several groups to organise our photo stories by subject matter.
Selecting galleries for the gallery carousel widget
Whether you have a custom home page with a carousel widget, or a standard home page configured to display a carousel – you’ll be using the Gallery manager to select which galleries you want to appear in the carousel.
- If you have selected the option Home page carousel galleries only, uses gallery settings for display order with a maximum of 50 galleries for the standard home page, or you have specified parameter src:0 in the custom page widget, then the carousel displays galleries that have the setting Home page carousel. You can select galleries in any level or group. The specific settings for the carousel galleries don’t matter either, i.e. you can select Search only galleries, regular galleries, slide show galleries and so on.
- If you have selected the option Last 50 galleries from any root level (parameter value 1 in the widget), then the 50 newest galleries will load into the carousel – regardless the gallery settings, groups or levels.
- If you have selected Last 50 galleries from selected root levels only (parameter value 2 in the widget), then use the Gallery manager to select the root levels from which galleries will be taken (regardless of the groups within the root levels). Edit a root level by selecting it in the dropdown box at the top. Then click the small arrow in front of the root level name in the sidebar. Now click edit level and then tick the option Enable display in home page gallery matrix. Scroll down and save the root level. Repeat for any other root levels you want to include.
For all of the above settings, if a gallery is not published, it will not appear anywhere. Also note that specific settings may be active depending on the active subdomain.
If you have a custom home page, below is the example HTML that you can add if you want to display the carousel. You may have to tweak the CSS to make it look like it should. Whether or not you’ll have to do this depends on your other customisations.
The carousel widget is explained in detail in the article Infradox XS widgets.
Linking galleries or groups to contributors
You can link galleries and/or groups to contributors. This function was added so that you can for instance display all of the contributor’s galleries on his/her profile page. It can also be used to show e.g. all features of a contributor when viewing one of his/her features and so on.
As an example, create a top level and call it “Photographer galleries”. Then create groups inside this top level for one or more photographers. Link the groups (i.c. photographers) to the correct contributors. Then create galleries in each of the photographer groups. You can now list all the photographer’s galleries on his/her profile page. In this example, the root id that we have created for “Photographer galleries” is 881. You can now use the following widget in the profile template to automatically list the photographer’s galleries:
<?xs contributor(‘galleries’,{source:1,rootid:881,style:4,max:15,sort:0,widgetid:contributorgalleries,textoption:2}) ?>;
For a detailed explanation and an example, please read this article: Setting up the contributor pages.
Testing the gallery layout settings
In the Gallery manager, click on a group or gallery title in the tree panel on the left. The grey box at the top of the dialog will show the URL that will be used to access the final client facing page. Click the Test url link next to it to open the page in a new browser window (or tab).
Note that you can also change the parameters of the URL to test different layout settings without having to make changes to a gallery’s settings. The last digit in the URL is the layout parameter, e.g. in www.infradox.com/gallery/studio-shoots/1314/1344/581/0/miranda.html, the number 0 is the layout parameter. However, certain layouts require specific files to have been generated.
- Parameter value 1 is used to show a full screen slideshow, the required files must have been generated with the tools in the gallery manager.
- Parameter value 2 is used for a blog style gallery layout, this layout also requires the files to have been generated with the Gallery manager or you won’t be able to test it.
- Parameter value 3 is used to display the so-called Biography layout. This layout can be used without having to generate additional files first.
- Parameter value 4 is used for Features. The features layout must have been configured first. More information about the latter option can be read in this article: Customising the feature page.
- Parameter value 5,6,7 are used for the custom gallery templates that you can create with the code editor.


