For Infradox Flex version 32.17 and later
This article explains how you can change the appearance of the admin dashboard and toolbar.
Before you start
Make sure that your toolbar is showing. If not, then enable the toolbar via My account in the menu on the client facing website. Now click on “Dashboard” in your toolbar. At the bottom of the dialog, click on “Customize”.
Every staff member has his/her own dashboard and toolbar. Making changes to your dashboard and toolbar will not affect other staff members.
Configuring the Toolbar
The top of the dialog will show the items that are configured to appear in your toolbar. The items that you can select depend on your permissions and on the modules that are active on your website.
To display all available items, click on the “Reset” button.
Rearrange the order of display by dragging and dropping the menu items.
You can remove items from your toolbar by clicking the bin icon on the right of the item labels.
Note that the “Batch” menu item is available via the toolbar only. Remove it from the toolbar only if you don’t use the batch function. All other items can be accessed via the dashboard so you can remove those items from the toolbar if you wish. The only item that will not be available in your dashboard if you open it on the backoffice pages is the Gallery manager item. That menu item appears in your dashboard on client facing pages only.
To make the “Dashboard” toolbar item appear as a pull down menu with all the items that are in your dashboard, make sure that the tick box is checked for the “Pulldown” menu item. Untick the button to make the “Dashboard” toolbar button function as a button to open the dashboard (without displaying a pulldown menu when you hover over it.
Configuring the Dashboard

You can rearrange the items in your dashboard and/or toolbar with drag and drop.
To remove items click on the bin icon on the right of each menu item. Note that you can always display all removed items by clicking on “Show all” at the bottom of the dashboard. This button will automatically appear if there are hidden dashboard items.
The dashboard pulldown menu in the toolbar (see above) will list all items that you have not removed from your dashboard. As explained above, you can remove the pulldown menu from the toolbar to make it function as just a button to open the dashboard.
To reset the dashboard (i.e. to restore the default order of display and to show all available items), click on “Reset” at the bottom of the dashboard.
To restore the default settings for both the dashboard and the toolbar, click on “Clear” at the bottom.
Recommendations
Menu items may appear in the toolbar, in the dashboard pulldown menu and in the dashboard. It is recommended to prevent duplicate items from appearing. E.g. if you want the Gallery manager menu item to appear in the toolbar, then remove it from the dashboard.
To make it easier to find the items that you need, it is recommended to remove all menu items from both the toolbar and the dashboard that you don’t use or that you need to access infrequently. Items that are removed from the dashboard can be make accessible quickly by clicking the “Show all” button in the dashboard. Note that this button only appears if there are hidden dashboard menu items.
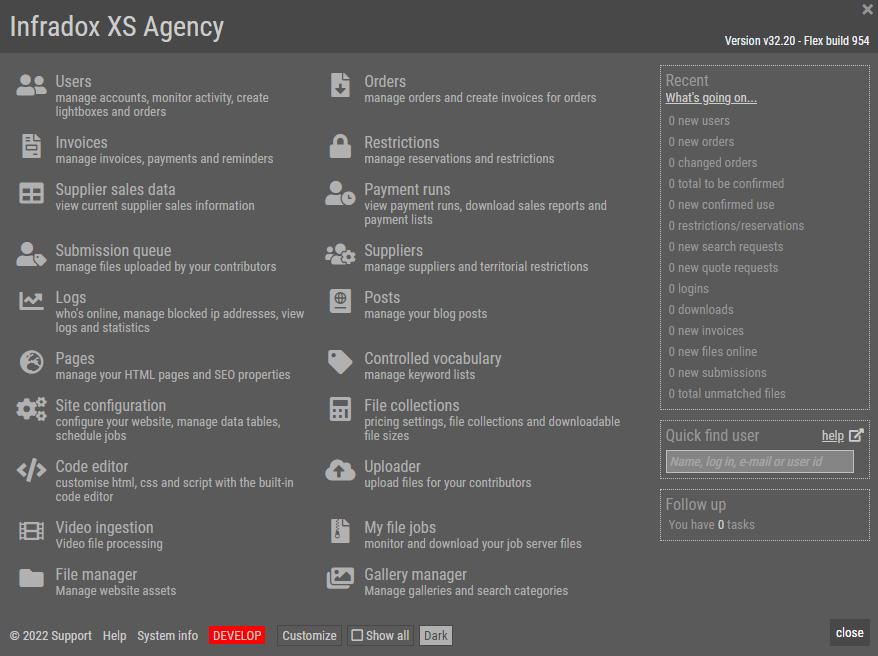
Dark/Light mode
In version 32.19 or later you can switch between Light (default) and Dark mode (screen shot below). There’s a button for this in the toolbar at the top of the back office pages. And there’s a button in the admin dashboard at the bottom of the dialog.