
You can let your users post search requests and follow the status of their requests. You can allow your clients to upload visual references and you can use your website to communicate about the status of requests.
Search requests posted on your website will appear in Back office. You can assign requests to staff members and you can communicate with users about the status of their requests.
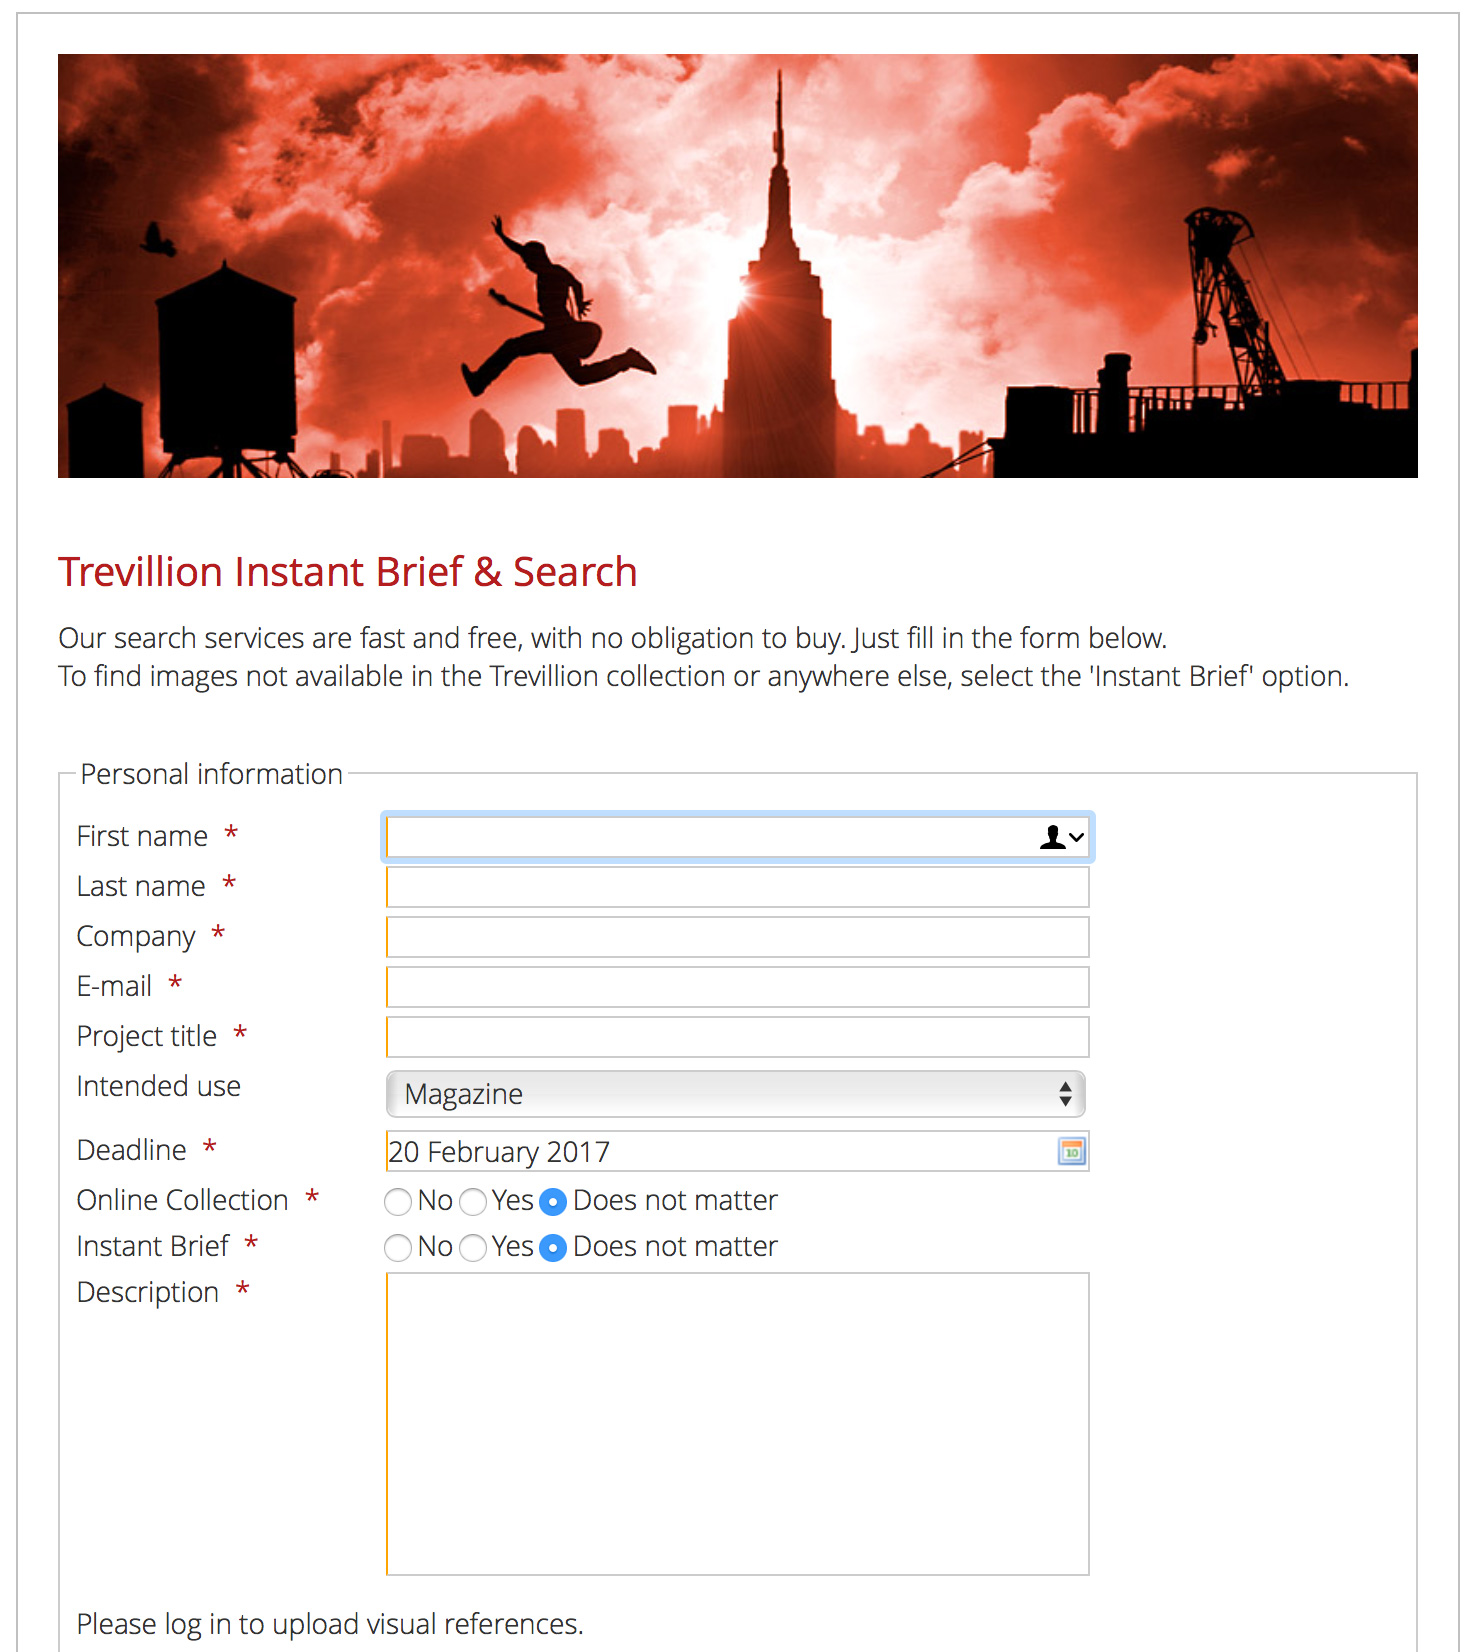
The above screenshot shows an example of a search request form.
Step 1 Configure the form
Go to Site configuration in the admin dashboard. Click on Website forms and then open the section Search request form.
Use the radio buttons to select which fields you want to add to the form and whether or not the fields are required. Add the labels for the fields that you want to use. The following fields will show as a dropdown box with predefined values if you upload list files: Intended use, Genre, Territory, Licence, Media, Exclusivity and Contact method.
If you want to allow users to upload visual reference files, then enable the field “Uploading of reference files” and select how many files a user may upload, what file types you want to accept and what the maximum size of each file is.
Click Save to store your changes.
Step 2 Upload text files for the dropdown boxes
This step is optional. If you don’t upload text files for these fields, then the fields will show as normal input fields.
Click Website files in the menu on the left and open the section Website forms list files.
If your website supports more than one user interface language, then you need to create and upload list files for each language.
The file name must end with the locale code (e.g. us for English, nl for Dutch).
To upload a text file with predefined options in English for the field Intended use, prepare a file with the name searchusage_us.txt – and upload it. The file names that you need to use for each of the fields is displayed on the website.
Step 3 Add the template code
Open the Code editor and select Search request > New request form in the dropdown box at the top of the editor. Click Load example and select the default template code to load it into the editor. Change as required and save your code. This is the page that the user will see to post a search request.
Now select Search request > Confirmed in the dropdown box at the top and load the code for this page into the editor. Make changes as required and save the code. This is the page that the user will see after succesfully posting a search request.
Step 4 Add a button or link to your website
The URL for the search request form is /searchrequest/new. To make it accessible on your website you must add a link or button to your menu, page footer, banner or wherever your want it. For example:
Step 5 Add a link to My Requests to the website
If you want, you can grant users access to a page that lists their requests and the status of their requests. The URL to access this page (requires the user to log in) is /searchrequest/myrequests. Add it to the My Account menu or wherever you want it to appear. The default Confirmed template (see step 3) also has a link to this page.
Step 5 Enable e-mail notifications
This is another optional step. You can see new requests in backoffice, if you want to receive an e-mail notification when a user posts a request – then go to Site configuration and click on E-mail configuration. Check the box “Send me a notification when a search request is created or changed” and save the settings.
Step 6 Change the e-mail templates
Go to Site configuration, click on E-mail templates and select English in the dropdown box at the top.
Find the file /us/adminsearchreqnotif.txt and click on its name. This is the template that is used for e-mails that are used to notify you when a user posts a new search request. Change as needed and click Save local copy.
Find the file /us/searchreqnotification.txt and click on its name to open the dialog. This template is used to send end-users an e-mail when you post changes to their request. Change as required and click Save local copy.


