This article describes how you can enable the HTTP and/or FTP upload function for suppliers, and how you can review the files that photographers upload – before you allow the files to enter the database. The submission system is entirely web based. Note that there are two different ways of allowing suppliers to upload using FTP. First, if you have the supplier editing module – you can allow your suppliers to create an FTP account from within the website. Files that are uploaded either with the HTTP uploader or with FTP will then go into the supplier’s holding area where the meta data can be edited and so on, before finally submitting the files. Second, it is also possible to have separate FTP accounts for uploads that need to bypass the holding area/submission system. Such files will be processed immediately.
Important: Files that are not submitted are removed from the contributor holding area if those files have been in there for more than 3 months. Make sure to inform your contributors about this.
How to link a supplier/photographer to a user account
Note that besides the options described below, it is possible to automatically add supplier records based on file metadata. Further information about this can be found in the article about the Metadata repository.
- Option 1 – You can configure your website to automatically create a supplier account and to then link it to the user account when a contributor/photographer registers on your website with the Enable contributor registration option enabled. Go to Site configuration, Website forms, Registration forms to enable this option. Then save your changes and go to Site configuration, New user defaults. Enable the option Automatically create a supplier record for users who register as a contributor.
- Option 2 – Go to Supplier management and find the supplier record. Click edit and in the Supplier dialog click on the user account tab. Enter a first name, last name and/or organisation name in the input boxes, and click the Link to user account button. You can enter information in only one of the three fields, but the more information you enter, the more accurate the list of suggested user accounts will be *. If you see the user account in the list then click on the name. The suggestions list will close, and you’ll see the permission settings appear in the dialog. The settings are described further down.
- Option 3 – Go to User management and find the user account. Click on the user’s row to open the user properties dialog. Click on the Supplier tab. You’ll see the user’s first and last name in the input boxes *. This information is used to find a supplier (or to create one), you can change what’s in these boxes if so required e.g. if the user is in the supplier list with a different name. Click the Make supplier button. This will show a list of suggested suppliers – the supplier must have been created already but you can also add a supplier from this dialog as described below. Click on the supplier to close the list and you’ll see the supplier settings appear in the user dialog. The settings are described further down.
* If there is no supplier record yet, then click on Add supplier at the bottom of the supplier suggestion list. You can now select a supplier group and enter a match code and sort name (usually the supplier’s last name). Then click on the Create button to add the supplier record. You can now link the supplier record to the user account.
* Note that if you change the input boxes while the list of suggestions is open, the list will automatically reload with new suggestions. The suggestions include names of suppliers that are already linked to a user account – these are shown in red. A supplier can be linked to only one user account (and vice versa).

Screengrab showing a supplier’s settings for uploading and submissions
Finding out which user accounts are linked to suppliers
Go to User management and change the Filters dropdown to Suppliers. Change the Date range dropdown to Ignore date range and click the List users button. This will load all the user accounts linked to suppliers.
Applying a supplier’s permissions
- Allow supplier to edit his/her content
Check this box to enable editing permissions on the user’s account. The user will only be able to edit his or her own files (i.e. files that are linked to the supplier). You can allow a user to edit files even if you don’t allow them to use the HTTP upload function. I.e. files linked to the supplier can be edited by the supplier, regardless of how such files entered the system. - Enable HTTP upload
Check this box to allow the user to upload files with the built-in HTTP upload function. You can allow users to do this even if you also allow them to use FTP upload. And you can allow users to upload this way whether you want to review their files first or not.
HTTP upload settings for suppliers
Check the box Apply defaults from Defaults & licencing to files that the user uploads to automatically apply the Defaults for new content that you have configured in the supplier’s dialog. If you have entered a credit line and you have checked the box Update credit line, then this value (credit) will be applied to the files that the user uploads, and the user will not be able to change this field in the upload queue page. Note that this also applies to FTP uploads that are linked to the supplier’s holding area (below). - Enable FTP upload
It is recommended to use the HTTP uploader, but if you have suppliers that have problems with it (e.g. because of a too slow connection) you can grant permissions to upload via FTP. On the HTTP upload page, the supplier can click the FTP button. If he or she already has an account, the dialog will show the supplier how to connect. If not, the supplier can create an account immediately by use of the same dialog (this is a built-in function). If a supplier uploads files using FTP, he/she will still have to go to the holding area to check and finally submit the files. - Keep uploaded files in the submission queue
If you want to review files before you allow the files to enter the database, then check this box. To make a supplier upload via the submission queue, you must enable the HTTP upload function (described above). If you leave this box unchecked, then the files that a supplier uploads will enter the database without going through the submission system.
Submission queue settings for a supplier
If you have enabled the Keep uploaded files in the submission queue option, then you can limit the number of files the user may upload per day, week, month or year. Enter the number 0 and select the No maximum radio button if you do not want to limit the number of submission queue uploads.
Contributor’s toolbar
If a user has permissions to edit his/her files, and/or to use the HTTP upload function, then a toolbar will appear on the top left of the screen if the user is logged in. This toolbar gives access to editing single files when viewing a preview page, batch editing, the HTTP upload function and to the submission queue.
Testing the supplier functions with an administrator account
Unless your website is running in “Flex”, you can’t test the supplier functions with an account that has administrator permissions. For testing purposes, create a new user account, link it to a supplier record, and do not enable administrator permissions on the user account that you created.
Flex websites do let you create user accounts that are both admin and contributor.
Displaying an instruction window upon page load
In version 30, you can configure a window to appear when a photographer loads the HTTP uploader. You can use this for example to display instructions, terms and so on. First go to the Code editor and select custom 20. You can use html to create whatever kind of dialog you want. When you are done, go to Site configuration, Submission settings and enable the setting Display page load popup.
Uploading files with HTTP by suppliers
When logged in as a supplier / photographer, click Upload files in the toolbar at the top left of the screen. The page will show any files that are still waiting to be confirmed by the user. To allow the user to check if everything is ok and to make basic changes to the metadata before actually sending the files, files are kept in a personal so called holding area. Note that the number of files that the user can upload in a given time period can be limited by editing the permissions as described above. The user can upload files via a dialog by clicking the Drag & drop area, or multiple files can be uploaded by dragging the files there. The server will extract any embedded metadata, apply the configured defaults to it (read above), create a thumbnail and then the file(s) and metadata will show in the holding area. The user can now simply scroll down to finish the upload or he/she can edit the data, change the settings for the files and so on first.

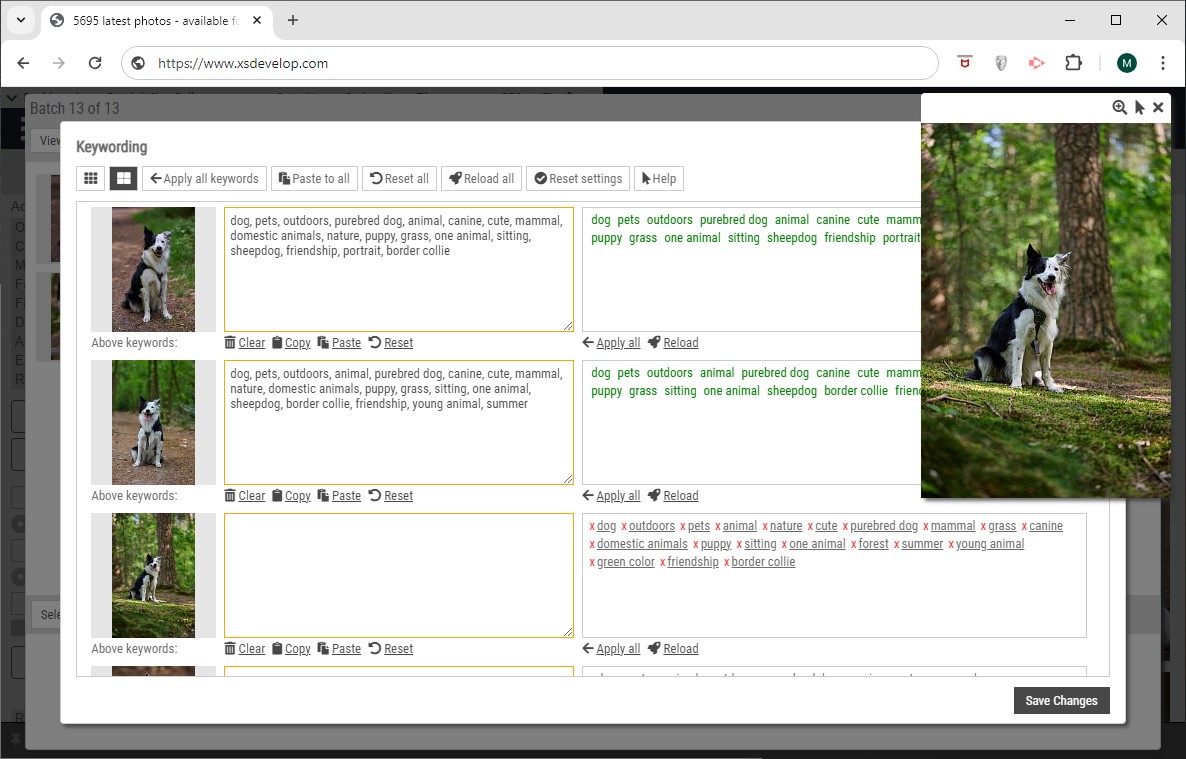
Example screengrab of the suppliers upload page / holding area
Changing metadata for multiple files in the holding area
To change the metadata for more than one file at once, the user can click the Batch edit button at the top of the page. A batch edit dialog will appear where one can enter data in the configured fields (the fields can be changed in the Metadata repository). If you only want to change the properties (e.g. Rights managed, Editorial, Commercial, Property release, Model release, Color, Illustration) then leave the input fields blank and check the Update the properties checkbox at the bottom of the dialog. Note that the Batch edit function only affects fields for which you have entered anything. Without making use of the Batch edit dialog, it is still possible to copy all the data and settings from one file to all or selected files in the holding area.
When done, the user submits the files in the holding area by clicking the button at the bottom of the page. What will happen next depends on the permissions that have been configured for the user. I.e. the files are either submitted for processing and into the database within a few minutes, or the files go from the holding area into the Submission queue. Note that the user can also save any changes made to the files in the holding area without submitting the files – by clicking the Keep the files in my holding area radio button.
Changing which fields appear in the upload dialogs and making fields required
You can configure which fields will show and which of these fields require information to be entered – in the metadata repository (Site configuration, Metadata repository).
Underneath each file in the HTTP uploader, there’s an area with properties. E.g. color/black&white, RM/RF, Editorial only and so on. You can configure which of these properties you want displayed so that the contributor can select the correct values for each file (Site configuration, Submission settings). The defaults for these properties are automatically applied using the supplier’s settings (or the group’s settings) for new content. If you hide certain properties via Submission settings, then you can specify which value to automatically apply without letting the contributor change these properties. E.g. always make photos RM, or use the settings as configured for the supplier etc.
Uploading files with FTP by suppliers
As described above, the supplier can create an FTP account via the HTTP upload / holding area page. Files uploaded via FTP will not appear online automatically (note that it is possible however, to have FTP uploads that bypass the holding area/submission system). The supplier will have to go to the HTTP upload page first. If there are new files in the holding area, these will be processed when the page loads. This means that a thumbnail and preview are created, and the process generates an xml file for the embedded metadata. If files do not meet the submission criteria, these are marked and must be removed before the rest of the files can be submitted. Suppliers can not delete files from their FTP folder with their FTP software (e.g. Filezilla). They can however delete files on the HTTP upload / holding area page.
The Submission queue from a photographer’s perspective
A photographer’s files go into the submission queue, if you – as an administrator – have selected the option Keep uploaded files in the submission review queue, in the supplier properties dialog (read above for further information).
The photographer can either click the Submission log button at the top of the upload page, or he/she can click the My submissions button in the toolbar at the top left of the page. The submission queue page shows all the files that match the criteria that can be selected at the top of the page. There are buttons to limit the date range on the left, and there are buttons to filter for certain statuses on the right. As a default, the page will show all files – regardless of the status – that are still in the queue. Files of which the status hasn’t been changed by an administrator will keep the status New. The photographer can view the history of a file in the queue once the status has changed. I.e. one can see who changed the status and when the status was changed.
There may be files that require action from the supplier/photographer. An administrator may for example have questions that must be answered before accepting the file. Such files can be listed by clicking the Waiting for reply button at the top of the page. To reply, simply click the Reply link in the overview to open the dialog. The administrator will be automatically notified. All files (including rejected files) will remain visible in the submissions overview, except for the files that are deleted from the system by an administrator.
Files that are sent back to the upload queue
In version 29 or later, a staff member can send a file back to the upload queue. For example because you want the photographer to add more keywords or other metadata. Such files get the status “Sent back” in the administrator’s overview, and the files will reappear in the photographer’s file uploader accompanied by any instructions that you enter. The photographer can now make changes and submit the file(s) again. Such files appear as “resubmitted” in the administrator’s overview.
The Submission queue from an administrator’s perspective
Allowing an administrator to use the submission queue
Log in with the Super administrator account. Find the administrator in User management and click on the row to open the user properties dialog. Click on the Admin tab and check the Submission queue option. Save the properties and the permissions will take effect immediately.
Using the submission queue
To view files in the submission queue, click Submissions in the administrator menu. You can limit the files that you see with the tools at the top of the page, i.e.
– limit to files uploaded in a date range
– limit to files that were updated (status changed) in a date range
– list files with a certain status only and/or only files that are waiting for the photographer to reply to your questions/comments
– list files from a certain supplier only
– list files from a certain supplier group only
– list files that have a specific priority code
The page will list the files that are in the queue – matching your selection criteria. You can hover over a thumbnail to view a larger version. Next to the thumbnail you will see the original file name that you can click to load the full size image in a new browser tab. Underneath the file link, you’ll see a link to the XML file with the metadata. Click it to open a dialog that displays any available data (e.g. keywords, caption and so on). Finally, there’s a preview link that you can click to open the preview browse dialog.
Assigning priority codes
You can automatically assign a priority value (between 0 and 5) to new files by creating rules in the metadata repository. You can do this by specifying words that you want to look for in one or more fields. E.g. if the category field contains the word “news”, then assign priority 1. The metadata repository can be changed in back office (Site configuration > Metadata repository). Open the properties of the field for which you want to add rules and then click on the “Submission queue” tabsheet.
Editing the raw XML data
The overview will shows links next to the thumbnails. The metadata (xml) link will open a dialog that displays the metadata. You can make changes to the data before you accept the file. Note that the metadata in the XML files is “unprocessed” data. I.e. it has not yet gone through any of the data processing procedures because the file is not in the database yet.
- Deleting files
You can delete files from the queue without providing any feedback or without keeping a history, by clicking the Delete button. If you don’t delete a file, a thumbnail will be kept on the server regardless of the status, so that the photographer can see what happened to his/her files. You can – but you don’t have to – use the this function to delete files for which you have already provided feedback, files that you have accepted or rejected and so on. - Accepting files
Click the button that shows the current status to open the status dialog. You can accept files and make them visible on the client facing pages, and you can accept files without making the files visible on the client facing pages. The dialog shows radio buttons that let you chose the new status and how the file will be processed once accepted. To make files visible after the files have entered the database (if you select Accept hidden) you’ll have to remove the filter from those files by either editing the files from the preview pages or by use of the batch edit function. - Rejecting files
If you reject a file, the high res file and its associated XML file are removed from the server. A thumbnail will be kept so that you can still see the file later in time and so that the supplier can see what happened to his/her submission. You can select a “reject reason” from the dropdown to quickly provide feedback when rejecting a file. You can maintain the list of reject reasons via Site configuration, Submission reasons. - Pending files
The status Pending is intended for files that you may accept but only after the photographer has replied to any questions that you may have. You may for example want to know if a better version is available, if there’s a model release and so on. - Sending files back to the upload queue
If you want the photographer to make changes to the file, then you can select the status “Send back”. If you choose a reason in the dropdown, and/or if you enter public notes – then these will appear underneath the thumbnail on the photographer’s upload page. E.g. “Please add more keywords”. The photographer can then make the changes and submit the file again. - Downloading files (32.9 or later)
You can download files and the metadata sidecar files (XML) if the files have the status New or Pending. The selected files are downloaded as a ZIP file. Each file has the submission queue number as its file name. The original file name can be found in the sidecar XML file.
Viewing larger versions with quick actions
Click on the thumbnail – or on the Preview link next to the thumbnail – to open a dialog with a 600 pixel preview, the file specifications and the metadata (see screengrab below). You can click the arrow buttons on the left and right (next to the image) to go to the previous or next file in the overview without closing the dialog.
By clicking the preview you can select or deselect the file. You can then apply the same status to all selected files with the buttons in the toolbar after closing the dialog. E.g. to accept many files at once.
You can also accept or reject files immediately while browsing the previews with the Quick actions shown at the top of the preview. When you reject a file, you can select a reason in the dropdown box. After you click Accept or Reject, the new file will automatically show.
Note that in this mode, you can only select a Reject reason as feedback. If you want to add more feedback or ask a question et cetera then use the status dialog by clicking a status button in the overview.

Providing feedback to the photographers / suppliers
The status dialog allows you to enter both internal and public notes. The public notes can be seen by the photographer/supplier, the internal notes can be seen by administrators only. When you submit a status change, you can allow the photographer to reply, and you can require the photographer to reply. The latter can be used if you need more information before accepting a file into the database. Note that you can also send a file back to the photographer’s upload page where the photographer will be able to make changes before submitting the file again.

To provide feedback, use the status dialog. You can open it by clicking the file’s status button (e.g. New) in the overview.
Notifying the photographer of status changes
In the status dialog, click the checkbox Post above notes also as message. This will show a notification if the photographer is still logged in or it will display a notification the next time he or she logs in. The notification message box will have a link that takes the photographer to the file in the submission queue.
Viewing a file’s history and removing messages that are linked to files in the submission queue
If the file has a history (i.e. its status has been changed) you’ll see the last change on the right of the overview. Click the link View history to open a dialog that shows more info. Messages / status changes that are linked to a file are also visible at the bottom of the status dialog (click the status button in the overview to open the dialog). To delete messages, open the status dialog and click the delete button on the right of the status that you want to remove.
Viewing files that are still in the contributor’s holding area
Files that are uploaded but not submitted (i.c. not sent to the database or the administrator’s submission review queue) remain in the user’s folder on the server. To view what’s still in there, open the supplier properties dialog (via User management, Supplier management or by finding the user with the quick search function in your dashboard) – and then click on the tab “holding area”. You can click on the file name next to the thumbnail to open the high res file in a new browser window or -tab. Click on the xml link to open the metadata xml file.
Processing of files
Files that are entering the database after you have accepted the files, or if the user has permissions to upload directly (without going through the submission queue) are processed the same as files that are uploaded with FTP or copied into the processing folders from external files. This means that the high res files are moved to the file processing queue on the server – this takes care of generating the different thumbnails and previews and adding two copies of the master files to the storage servers. The metadata is processed to apply the correct filters, to create galleries (with Datamatic), extract words for the keyword suggestion function and any other data rules that may have been configured for you. Files are processed in batches every x-minutes. Generally speaking, files will be available on the client facing pages within 2 to 5 minutes.
Automatic clean up
(For version 32.9 or later)
Files remain in the contributor holding area until the contributor submits the file to the database. If however files are in the holding area for longer than 3 months, then those files will be automatically removed.
Once submitted files have been handled in the submission queue, only the thumbnail image remains – i.e. preview images are automatically removed for all the files that have a submission queue status Rejected, Accepted or Deleted.
FAQ
- Can files that are uploaded with FTP go into the submission queue before entering the database?
Yes, files that are uploaded with FTP by a supplier go to the suppliers holding area first. The rest of the process is the same as it would be when files are uploaded using HTTP. It is also possible to have FTP accounts for suppliers that bypass the holding area/submission system. - Can I use the submission system for photographers that don’t exist in the supplier list or that don’t have a user account on the website?
No, this function can only be used if you have configured permissions on a user’s account and that account must be linked to a supplier. - Can I allow someone else to upload for a photographer?
Yes, if you want to allow someone else to upload and edit for a supplier, you can simply link the supplier to any user account. - I want photographers to upload small files only, can I limit the sizes?
The upload function supports files with a maximum size of 50 MB on disk. You can configure a minimum size in pixels and/or size on disk (Site configuration, General settings, Submission settings). If you ask photographers to upload small files, you’ll have to ask them to upload larger versions of the files that you want to accept. This is possible with the built-in communication system. - Can suppliers upload video with the built-in HTTP upload function, does the Submission queue support video files?
Currently there’s support – both in the HTTP upload function and the Submission queue function – for images only. The support file types depend on your version and configuration settings. You can find more info about video files here: Video files FAQ - I don’t want to use the Submission queue, but I do want to review files before they appear on the client facing pages. Is this possible?
This is possible by unchecking the setting Immediately searchable in the Defaults for new content setting in the supplier’s properties dialog. This means that a hide filter will be applied to new files that enter the database. Only administrators will be able to see the files. You can then remove the hide filter to make the file visible on the client facing pages (to do this for many files at once, at them to your batch and use the batch update function). - I want to use the Submission queue to review files but I want to upload approved files myself.
You can download any uploaded files and the sidecar metadata files as long as files have the status New or Pending. You can then upload those files yourself. It’s recommended to delete downloaded files from the Submission queue after you have downloaded the files. - I’ve linked my account to a supplier but I don’t see the supplier toolbar, what’s wrong?
If your website is not on Flex, then you can not use the supplier functions with an account that has administrator permissions. If you want to test things from a supplier’s point of view, then create a separate account, link it to a supplier record and don’t enable administrator permissions on it.
With Flex websites it is possible to have accounts that are both admin and contributor. - A supplier has uploaded files with FTP but these don’t appear in his/her holding area.
If files are uploaded with problematic file names, these are deleted from the server automatically and without feedback. File names must have valid file extensions and may not contain more than one dot (.). Also, file names may contain only abcdefghijklmnopqrstuvwxyz0123456789 -^@{}[](),$=!+~_
Upper and lower case are allowed. - Can I change the fields that the suppliers have to input?
Yes you can configure the fields in the Meta data repository and you can specify which properties (RM/RF, color/B&W, MR and so on) via Site configuration, General settings, Submission settings. - Can I send files back to the supplier’s queue, e.g. because they need to add more keywords
Yes this is possible on a file by file basis, or for many selected files at once with the button in the toolbar. Supplier’s can submit the same files to the administrator’s queue again without having to upload the files – files that were “sent back” reappear on their upload page. You can also add notes or send messages to let them know what to do. Files that are then “Resubmitted” by the supplier appear again in your administrator’s queue.