
You can upload model release, property release other other documents for files in your database. This function lets you create a single release and link it to multiple files. Documents such as PDF, doc, txt but also JPEGs and other document formats are supported.
To upload a document, first find the file (e.g. photo) using e.g. the client facing pages of your website, and open the preview page or preview window. In the admin toolbar, click on File to open the properties dialog. Click on the Release tab. If there are attached documents, you’ll see a list on this tab sheet. To add a release document, click on the Upload file button to select and upload your file. Once the file is uploaded to the server, a new licence entry will be created and it will appear in the list. You can now click the Edit link if you want to change the type (it defaults to Model Release), if you want to add a description, or if you want to link the release document to multiple files. For example to link it to all files from one and the same shoot.
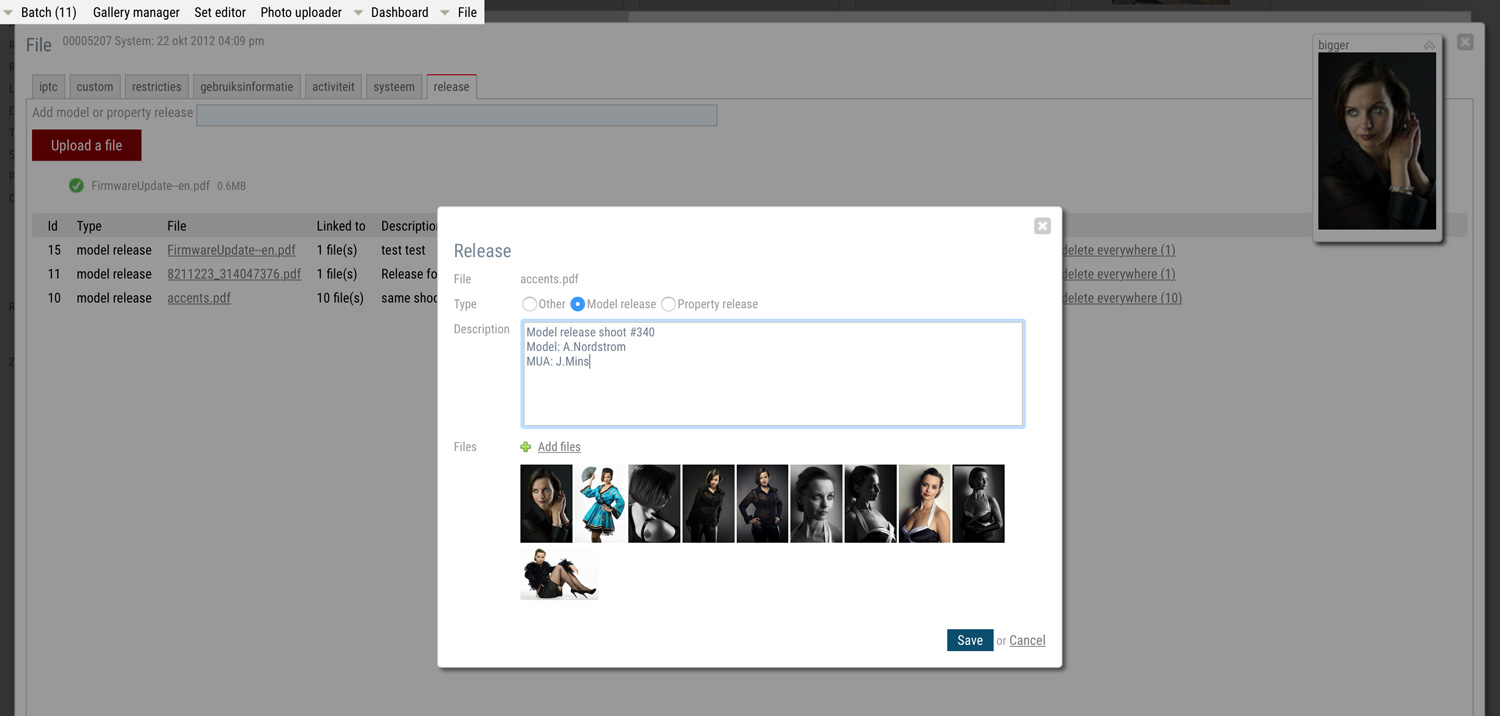
To link the release document to multiple files, click on the Edit link to open the properties dialog. Then click on Add files. The find file dialog will appear. You can enter a search query to find files, or you can select one of your lightboxes to display all files. You can now select one or more files in the list by clicking on the thumbnails or the checkboxes. When you are done click OK to link all the files and then save the release. The release document will now appear on the Release tab sheet of all files that you have linked. You can unlink the release from one single photo or video by clicking Delete, or you can completely remove it (and unlink it from all files) by clicking Delete everywhere.