In addition to the default icon images and the ones you can upload yourself, you can also choose to use the Google icons webfont. This is a very flexible option, offering more than 900 scalable icons to choose from. For an overview of all the icons, go to https://material.io/icons.
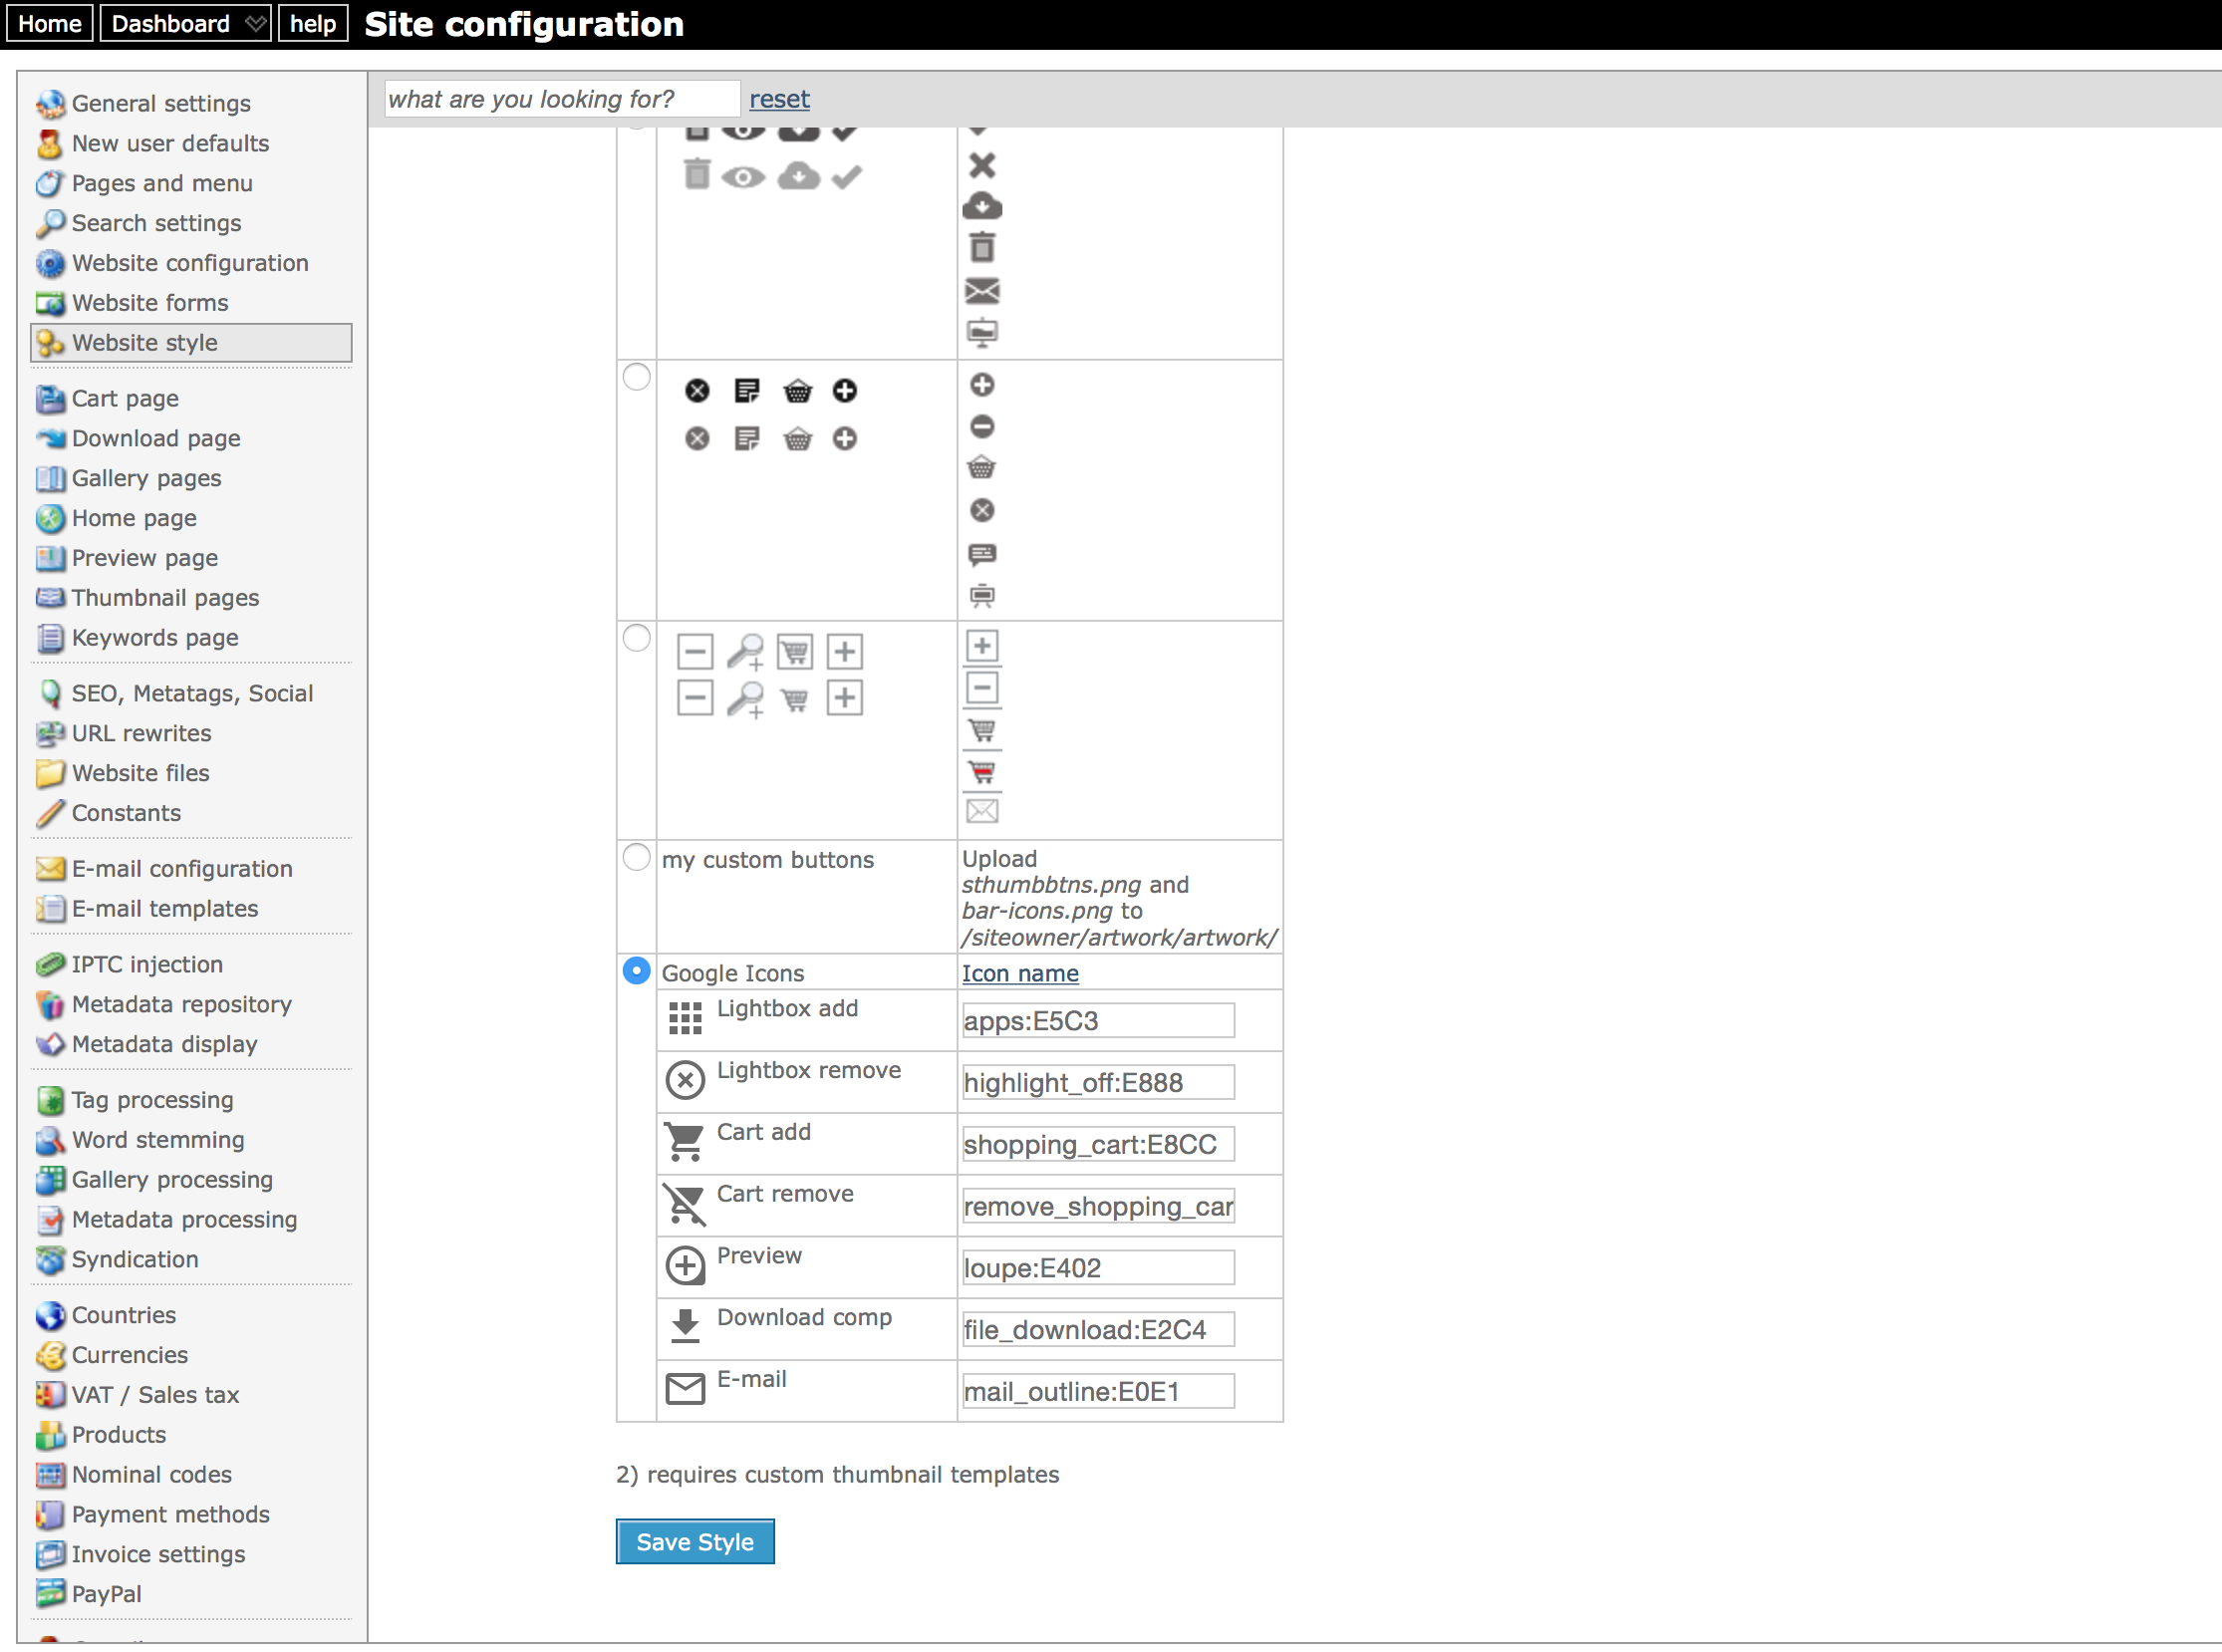
To enable Google icons, go to Site configuration and click on Website style. At the bottom of the screen, click on Button images. Select the Google icons option. By default, the names for the various icons are already there – including the codes for older browsers (i.e. MSIE version 9 and lower).
You can specify icons for:
- add to cart
- remove from cart
- add to lightbox
- remove from lightbox
- comping image
- preview

Backoffice screenshot showing the button icons configuration screen
You can simply lookup an icon that you want to use on the Google icons website, and enter its name in the appropriate input box for the icon you want to change in backoffice. As you change the name and move your cursor out of the input field, you will see the new icon appear. If it doesn’t show, then you need to check your input.
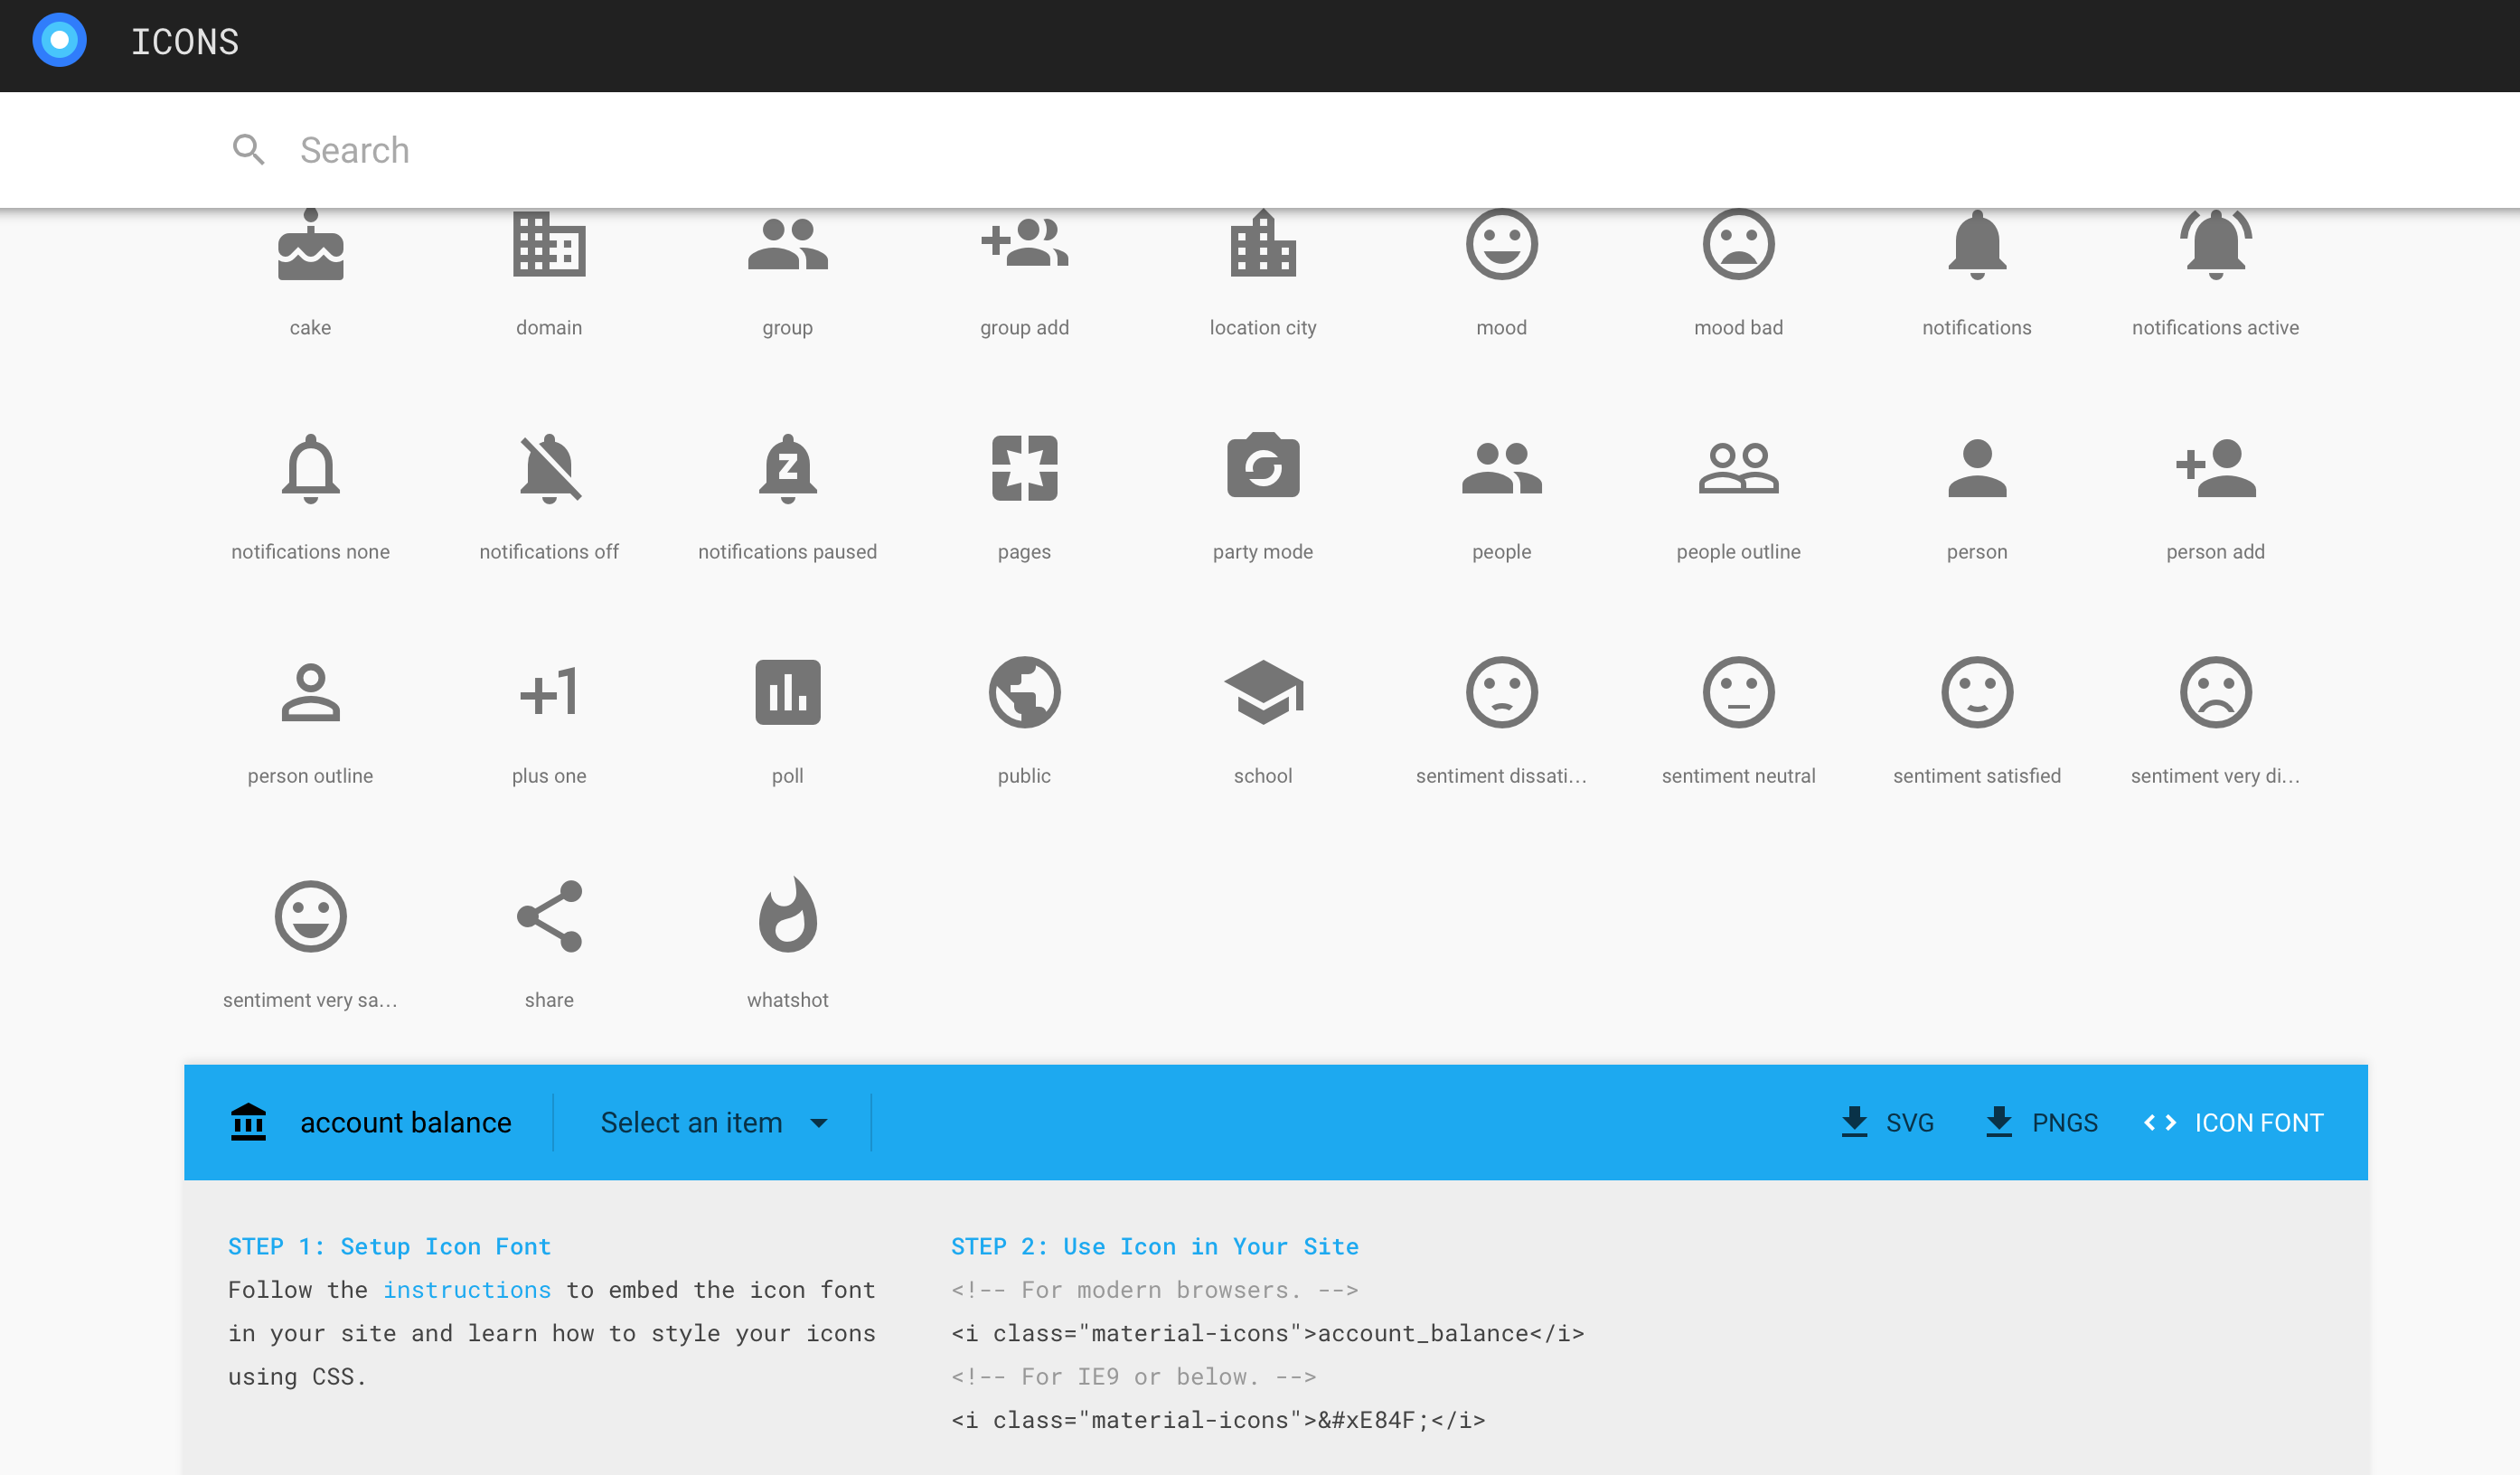
Note that the names are followed by a colon (:) and then a code. This code is optional but you should enter it if you want to support MS Internet Explorer version 9 and lower. To find the code that represents the icon, go to the icons website and click on the icon that you want to use. Then scroll to the bottom of the page where you’ll see a blue bar. Click on Icon font on the right. The information you need will show (see screen shot below).

As you can see in the screen shot, the name for the selected icon is account balance, the associated code for older browsers is . To get the code you need to enter in the input box, simply remove the part and the closing semicolon (;). So in this case the code is E84F. You enter this code after the icon name and a colon. So account_balance:E84F. (Note that spaces are replaced with underscores, this is done automatically).
If your website uses custom thumbnail templates
If you want to use Google icons in your custom thumbnail templates, then note that the links must have the class name “material-icons”, and the link text must be one of the following (between brackets):
- add to cart > [cadd]
- remove from cart > [cremove]
- add to lightbox > [ladd]
- remove from lightbox > [lremove]
- preview > [preview]
- download comp > [comp]
- e-mail > [email]
For example
In the above example, the correct icon name or code will be automatically inserted where the [preview] tag is.
Styling your buttons
You can easily style your buttons by adding CSS in the code editor. For example:
And to change the hover color:

